Introduction to the Getting Started Guide

Welcome to the Getting Started Guide for RAMP which is a part of the EU-funded project SHOP4CF. To accommodate you as a user of RAMP, this guide is meant to help and guide you through the steps to acquire the necessary knowledge that you need to be able to use the platform. The guide will introduce you to the RAMP platform, FIWARE, and the installation- and upload of a component.

Introduction to RAMP

RAMP is a platform tailored to small and medium manufactures and is made to empower industry 5.0 through the offering of various software components that focuses on the well-being of human factors and enabling decision-makers to make informed choices on new and improved processes. 

On RAMP as a registered user, you can find and use the following options that can be seen here below:

Data visualization 

Let you gain awareness of your processes through an improved overview of your factory’s data and address possible issues within your production line.

Component catalogue

Discover state-of-the-art solutions to boost your business processes. Browse through numerous components that offer a variety of useful tools and services.

Community of small and medium manufactures

Meeting point for professionals who are looking to connect and discover new and potential business partners.

Introduction to FIWARE

Digital solutions in the smart industry gather data from many different sources and processes and are analyzed to provide smart features. In accelerating strategic and operational activities, data must be shared among components of the industrial solution. On RAMP, FIWARE is used since it provides an enhanced OpenStack-based cloud environment and a set of open standard application programming interfaces (APIs) which make it easier to connect to the Internet of Things (IoT), process and interpret big data, and real-time media. The data spaces on the platform provide effective cross-domain data sharing and exchange enabling a user to receive data from a variety of devices and/or sources without worrying about the low-level IoT connection or data protocol.

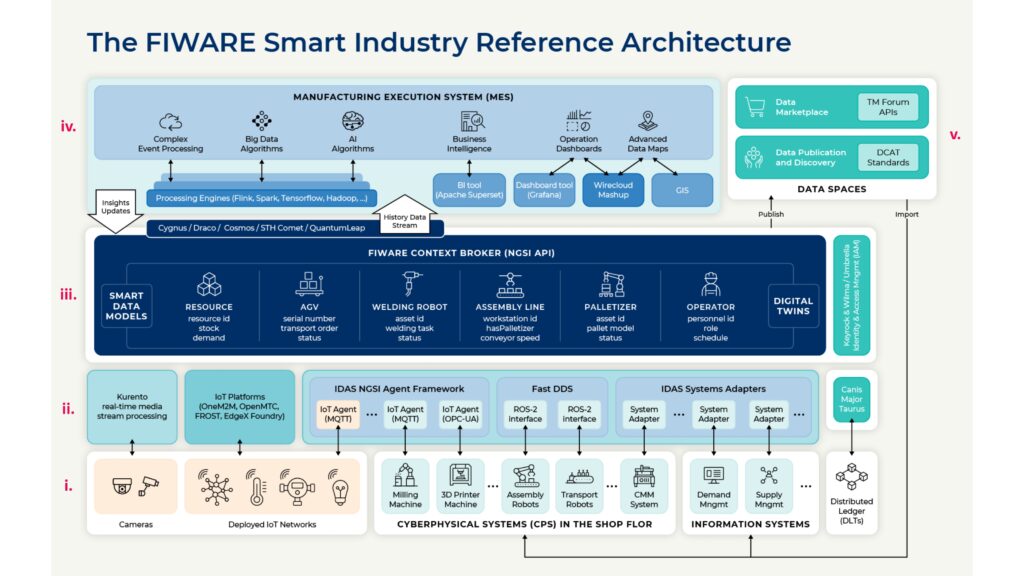
Figure 1: FIWARE Smart Industry Architecture (source: www.fiware.org)

Figure 1 presents the architecture of a FIWARE framework displaying the four main components:

i. Bottom layer: Internet of Things, cyber physical-system, and information systems. 

ii. Second layer: Software interacting with the bottom layer. 

iii. Core layer: FIWARE context broker. 

iv. Manufacturing execution system.

v. Data spaces: Data utilizing from the context broker for publication and importing to cyber physical systems on the shop floor. 

The first four objects FIWARE solutions must implement the core Context Broker component that enables us to manage context information in a highly decentralized and large-scale manner. The rest of the components are optional. FIWARE NGSI (Next Generation Service Interfaces) API enables the easy implementation of the context broker, by providing means to produce, gather, publish, and consume context information at large-scale. The Context Broker currently provides the FIWARE NGSI v2 API based on standard REST APIs.

FIWARE Data Models

FIWARE follows a set of standardized data models for interoperability among components. The data models contain a set of attributes, definitions and data types which are combined into a single entity. Each Data Model is defined using a JSON Schema with a key-value representation of FIWARE NGSI format and has two leading versions of the format: NGSI v2 and NGSI-LD.

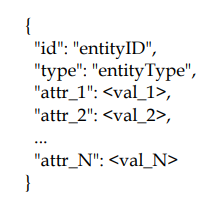
Figure 2: FIWARE NGSI v2 Data Model (source: here)

NGSI v2 Data Model

The main elements in the NGSI v2 data model are:

Context entities

A context entity represents a physical or a virtual object (e.g., a sensor, a person, or a manufacturing task to be executed). Each entity has an entity id and an entity type, following the system of FIWARE NGSI. The entity id and the type jointly identify an entity uniquely. Example: a context entity with id sensor-365 and type temperatureSensor. 

Context attributes

Context attributes are properties of context entities. Each attribute consists of an attribute name, an attribute type, an attribute value, and metadata. For example, the current speed of a car could be modelled as attribute current_speed of entity car-104.

Metadata 

The optional metadata field describes properties of an attribute value e.g., accuracy, provider, or timestamp. The metadata can also be defined through a dedicated field Context Metadata, which consists of metadata name, metadata type, and metadata value.

A sample NGSI v2 data model can be seen here below:

NGSI-LD Data Model

NGSI-LD is an evolved version of FIWARE NGSI v2 to better support linked data (entity relationships), property graphs, and semantics, and unlike NGSI v2 the main components of NGSI-LD are:

Entity

An entity is an instance and can be the subject of Properties and Relationships.

Property 

Property attributes represent the context data that changes over time. 

Relationship 

Relationship attributes represent the connections between existing entities using linked data. 

NGSI-LD API is defined using the JSON-LD specification to resolve conflicts among data attributes coming from different sources. JSON-LD introduces the concept of the @context element which can be used to assign unique long URIs for every defined attribute. The @context element provides additional information allowing the computer to interpret the conflicting data with more clarity and depth. Some of the main differences between NGSI v2 and NGSI-LD are that Entity IDs are URIs (URLs or URNs), the metadata is represented using nested Properties of Properties.

An example of Migration from NGSI v2 to NGSI-LD is shown in Fig.3.

Figure  SEQ Figure \* ARABIC 3: Example of Migration from NGSI v2 to NGSI-LD (source: here)

SHOP4CF Data Models

SHOP4CF architecture is based on FIWARE Smart Industry architecture shown in Figure 1.The Data Models used in SHOP4CF are based on FIWARE NGSI-LD Data Models, but are customized.

Specifically, an entity identifier in the SHOP4CF data model must be an Uniform Resource Name (URN), built as:

Build
urn:ngsi-ld:<entity-type>:<factory-id>:<entity-id>

Example
urn:ngsi-ld:Device:company-xyz:sensor-abc-12345.

The SHOP4CF Data Models are divided into two main groups: 

  1. Design data models 
  2. Execution data models

Design data models

Design Data Models define entities that do not change their status during the manufacturing process, e.g., the shop-floor locations, definitions of manufacturing processes, task definitions, etc. 

Execution data models

Execution data models are the entities that may change their status during manufacturing. Some examples are tangible resources on a shop floor, tasks instance under execution, alerts, etc. 

For more details, please refer to section 8 of the SHOP4CF Architecture, and a few sample data models belonging to these two groups can be found on the SHOP4CF GitHub page.

Installation of component

The following installation of a component is a general guideline on how to install a component. Please beware of specific installation requirements that can be for the specific component you are trying download and install. 

To install a RAMP component, the server must have FIWARE running correctly, meaning it
must be properly installed and functioning without issues.

You can find a script to set up FIWARE in the following repository:
https://gitlab.lst.tfo.upm.es/shop4cf/fiware-deployment

To use the script, follow the steps:

  • Clone the repository.
  • Open an Ubuntu terminal inside the directory of the cloned folder
  • Execute the installation file.
  • Check that the Context Broker is working properly by going to http://localhost:1026/version

Once FIWARE and the Context Broker are running on your server, you can begin the component's installation. Every RAMP component includes specific instructions for proper operation, including specific requirements and software installations that you may need to complete before starting to use the component. Be sure to read the available documentation before beginning the installation process. All the components installation process follows these simple steps: 

Install a RAMP component:

  1. Access the RAMP component catalogue: Go to the catalog on RAMP or click on the link here: https://ramp.eu/#/component/catalogue 
  2. Browse the component: Select the component you wish to use from the component catalog. OBS. Check component license for download availability. Contact the developer if necessary.
  3. Check for customization: Component documentation can be found by clicking on Technical information and afterward by clicking on Go to Docs  . Review the component's documentation/repository to determine if any customization is necessary.
  4. Download Docker Image: If no customization is required, download the component's Docker image from the RAMP catalog and proceed to step 7.
  5. Customize component (if necessary): If customization is necessary, follow the component's documentation or reach out to the developer for assistance.
  6. Create Docker Image: Create the component's Docker image with your customizations.
  7. Install Docker: If not already installed, download, and install Docker (https://www.docker.com/).
  8. Upload Image to Docker: After installing Docker, upload the component's Docker image using the command "docker load -I [image name].tar".
  9. Run Image: Run the component's Docker image using the command "docker run [image name]".
  10. Verify Installation: Verify the successful installation of the Docker image by using the "docker ps" command to check that the image is running, and all containers are active.
  1. Download the component Docker image: If no customization is needed, download the Docker image of the component from the catalog in RAMP and go to step 4.

If any adaptation is necessary:

2.Adaptation of the component: Follow the documentation of the component or contact the developers to adapt the component if possible.

3. Docker image: Create the Docker image of the component with the adaptations you have made.

4. Install Docker: If you do not already have Docker installed on your system, you must download and install Docker before continuing (https://www.docker.com/).

5. Upload the image to Docker: Once Docker is installed, you must upload the image to Docker. You can do this using the command "docker load -I [image name].tar".

6. Run the image: After loading the image into Docker, you must run the image. You can do this using the command "docker run [image name]".

7. Verify the installation: Finally, you must verify if the installation of the docker image was successful. You can do this by using the "docker ps" command to verify that the image is running and that all containers are active.

5. Upload of component

Promote your organization by uploading components to RAMP.

Upload a component to RAMP

  1. Register an account on RAMP and create your organization by clicking on your profile name and clicking on the ‘My organization’ tab. If you are already part of an organization go to Step 3.
  2. In the ‘My organization’ tab click on  Create a new Organization.
  3. When you have access to your organization click on ‘components’ and click on Add component.
  4. The create a new component guides you through what must be filled out to upload your component, or you can follow the guide below:
    • In the ‘General information you must fill out the following:
        • Upload an image (an image that promotes your component). 
        • Component title.
        • Summary. 
        • Applicable industries.
        • Description. 
        • (Optional) A favorite keyword that categorizes your component when searching for your component. 
          • To create a new favorite keyword, simply type in the keyword and hit Enter. 
    • Now click Next Step. In Demo links, you can fill out the optional fields, Video URL and Live demo URL, when finished click Next Step. 
    • Download links require one mandatory field to be filled out: ‘Select licenses’. Optional fields include: ‘Executable’, ‘Source-Code’, and ‘Docker image’, when finished click Next Step. 
    • The last step is ‘Technical details’ where you can provide optional information for Documentation, Interfaces Data input and output, and Key Hardware Software Dependencies. The only mandatory field is the type of component that you are uploading which needs to be specified by the drop-down menu. When finish click Next
    • In the ‘Characterization’ tab, add predefined keywords to improve component description and discoverability. Choose keywords from ‘Support workers’ and ‘Support tasks’ categories (refer to Appendix 7.1). Click Save when done.
  5. Your component can be found in the ‘Catalogue’ tab under ‘Software’ and your ‘My organization’ ‘Components’. 
  •  


Managing and editing your components on RAMP is easy. 

Managing your components 

  1. Make sure you are logged in on your profile and click on your profile name, go to ‘My organization’.
  2. Click on the desired organization’s ‘Components’ tab to see and manage the organization’s components. 
  3. In the organization’s components you can click on either Edit to change your component’s description, title, etc. or simply click  Delete  to delete your component.

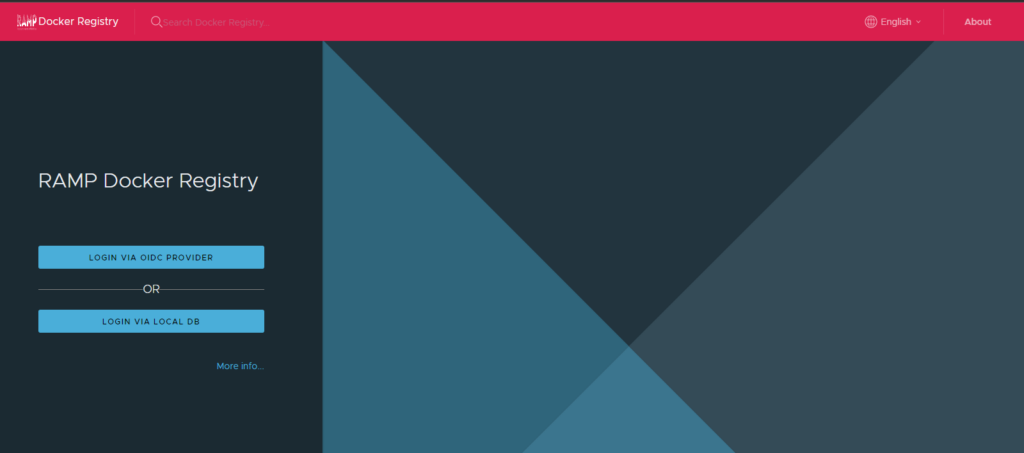
Uploading your Docker Image to RAMP, please use the following link and remember to have a login to access the site:

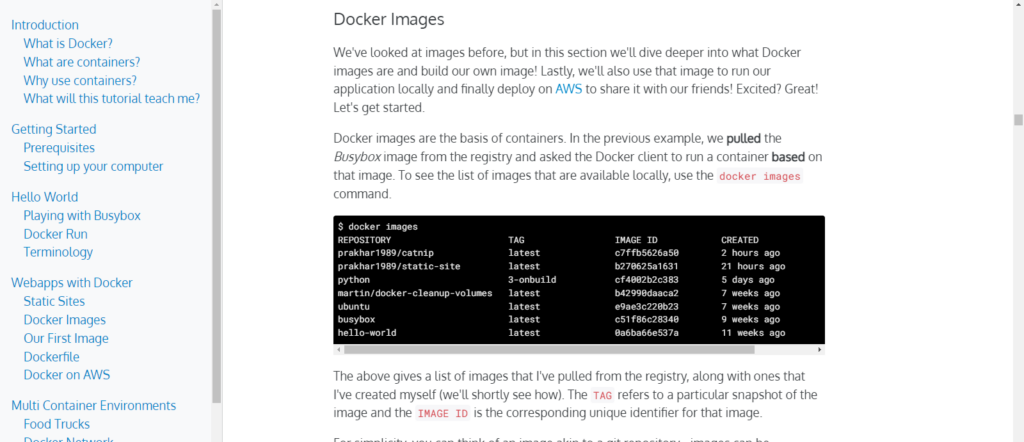
First time using Docker Image to share your component, please use the following link to help
guide you through the process:

It is a complete guide to how you get started with Docker Image provided by Docker.

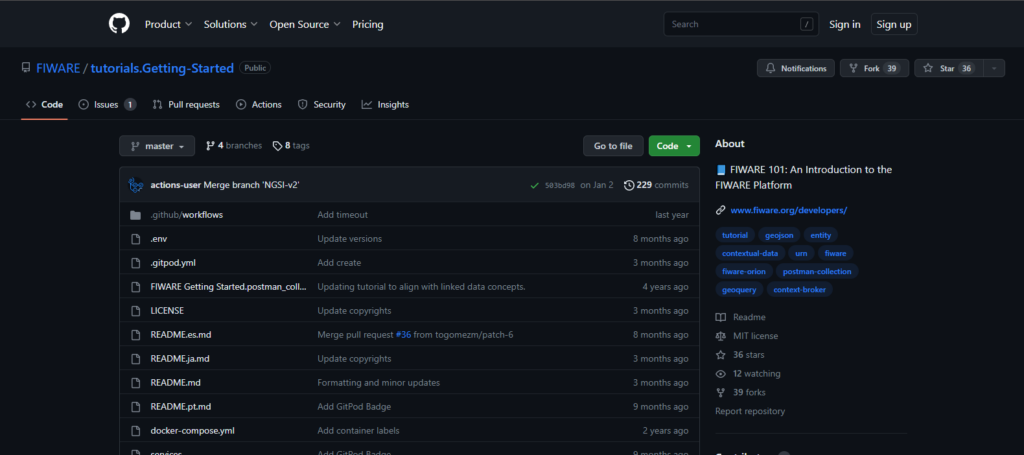
To get started with FIWARE, please use the following link to help guide you through the process:

The guide covers an introductory tutorial to the FIWARE platform.

Quality assurance for RAMP components

Available components and solutions on RAMP must be easy to deploy by system integrators since it is necessary that they are trustworthy and reliable. Assuring this, new components on RAMP must follow the described quality assurance (QA) practices in this section. The basic business model is that component suppliers get paid by the system integrators while system integrators charge the price to the end-user of the solution. The current business model assumes that transactions only take place once with a fixed price and does not assume pay-per-use, annual fees, or other revenue streams.

The first set of QA requirements must not be considered final since the purpose of the requirements is to align the existing tools and components with the framework of RAMP’s component catalog.

The requirements are built on two bases that are further elaborated and explained in detail: 

  • Align the components with the framework of the RAMP component catalogue 
  • Possible feedback received from manufacturing SMEs, technology Suppliers, and system Integrators during testing

These requirements are from an existing FIWARE set and can be found in the URL underneath, but please be aware of differences due to changes in FIWARE’s and RAMP’s operational models:

General:

  • All components have a seamless integration with the FIWARE NGSI, currently using FIWARE NGSIv2 which is expected to be compliant with ETSI NGSI-LD in the future.

Licensing:

  • All closed-source components must specify their license on how to use the component.
  • All open-source components must release under Apache License 2.0 (Apache-2.0).
  •  

Software Configuration Management (SCM)

Documentation:

  • All components must provide the following documentation:
    • readme.MD: A summary of what the component can do, how to use it, and why you should use it
    • api.md
    • architecture.md
    • getting-started.md
    • installationguide.md
    • user manual. MD

Testing:

  • All components must include a suite of functional tests to verify the proper integration with FIWARE Orion Context Broker.

Software release:

  • All components must have tags with a semantic release number and every release must have a unique version number.
  • Every release must have an associated Release Notes entry in the GitHub Releases section.

Integration:

  • All components must have a continuous integration system.

Tracking:

  • A Tracking system must be used for all components to manage the development work. The tracking system must include at least all your component’s bugs and/or known issues.

Code quality:

  • All open-source components must meet the coding standards defined in the GitHub repository.

Binary release:

  • All components are available on the RAMP marketplace as a docker image.
  • The availability of the latest docker image on the RAMP must be automated.

6. References

  • FIWARE. “The Open Source Platform for Our Smart Digital Future.” FIWARE, www.fiware.org/.
  • Cantera Fonseca, José Manuel, et al. “Fiware-Ngsiv2-2.0-2018_09_15.” Fiware.github.io, 2018, fiware.github.io/specifications/ngsiv2/stable/. Accessed 14 Feb. 2023.
  • FIWARE. “NGSI-LD How to – Fiware-DataModels.” Fiware-Datamodels.readthedocs.io, fiwaredatamodels.readthedocs.io/en/stable/ngsi-ld_howto/index.html.
  • Francisco Carvajal, Diego. “SHOP4CF / FIWARE Deployment.” GitLab, 2022, gitlab.lst.tfo.upm.es/shop4cf/fiware-deployment. Accessed 14 Feb. 2023.
  • Srivastav, Prakhar. “A Docker Tutorial for Beginners.” A Docker Tutorial for Beginners, dockercurriculum.com/#docker-images. Accessed 14 Feb. 2023.
  • Fox, Jason, et al. “Architecture.” GitHub, 5 July 2022, github.com/FIWARE/tutorials.Getting-Started.
  • Aromaa, S., Heikkilä, P. and Kuula, T. (2022) “D2.6_Guidelines for human-centered manufacturing
    environments 1.”

Appendix 1. Description of characteristics

In the ‘Characterization’ tab, you can select the predefined keywords from two categories:

  • Support workers; including keywords e.g., mastering complexity, solving problems, working safely (etc.)
  • Support tasks: including keywords e.g. designing, planning, assembling (etc.)
    The keywords related to supporting workers are based on framework of Future Industrial Worker characteristics (FIW).

The FIW framework includes four main characteristics describing future work and worker: smart, resilient, interactive, and healthy, and each of these include four sub-categories. It is beneficial that component developers familiarize themselves with the FIW framework to understand the background of the keywords they are selecting. See table 1.

  • Complexity master: Ensuring smooth production by monitoring work processes and systems and managing dependencies and priorities between the operations.
  • Problem solver: Preparing to solve problems quickly and patiently by utilising evolved practices or guidance proactively created for problem situations.
  • Proactive decision maker: Considering information from different sources when making decisions for example about the operations or maintenance of machines.
  • Sustainability oriented: Considering sustainability when making daily decisions, for example related to materials, waste, and maintenance of machines.
  • Creative: Seeking for new solutions to challenges, which may lead to improved work engagement or new innovations.
  • Self-leader: Guiding oneself to achieve work objectives, for example by taking initiative, organising work tasks, and following progress.
  • Flexible: Seeing changes as opportunities and seeking ways to adapt work tasks to new requirements or unexpected changes.
  • Continuous learner: Acquiring new knowledge and competences to expand skills, which benefits current work tasks as well as fosters up- and re-skilling if needed.
  • Motivated: Willingness to make an effort to achieve good results, which is shown as energy, commitment and persistence when completing work tasks.
  • Balanced: Feeling balanced of one’s work load and responsibilities as well as balancing requirements of professional and personal life, which fosters well-being and recovery between work shifts.
  • Capable: Having sufficient resources, skills, and capabilities to complete the work tasks without compromising work ergonomics.
  • Focused: Being able to concentrate on the ongoing work task, staying aware of the environment but not getting distracted too easily.
  • Communicative: Openly sharing task related information, plans, ideas, and potential challenges with others.
  • Collaborative: Fluently collaborating with team members as well as with interactive technology, such as collaborative robots.
  • Inclusive and intercultural: Valuing diversity and including all workers with different backgrounds (e.g., genders, ages, cultures and nationalities) in joined activities.
  • Safety oriented: Following and developing safety procedures and prioritizing safety when completing work tasks.
  1. Think about your component from the end-user/worker point of view and describe what kind of benefits it provides for the workers.
  2. Read through the FIW framework categories and select those characteristics your component supports in the work.
  3. Select suitable keywords based on the FIW framework (tab ‘Support workers’).
    Additionally, select keywords on work tasks (‘Support tasks’).
  4. Describe shortly (1-2 sentences) how your component supports each of the selected characteristics by clicking on the comment tab.